# How to Install Social Snap Addons
Note: Social Snap Addons are not standalone plugins. They require the Social Snap plugin to be installed and activated.
Social Snap Addons are available with PRO and Agency plans and not available with Plus or Social Snap Lite.
There are two ways you can install Social Snap Addons on your website: automatically, through your WordPress Dashboard or manually, by uploading plugin files.
Automatically Installing Social Snap Addons
Before we get started, please make sure that your Social Snap license is activated. If you need more help with that, please read our instructions on how to activate your license.
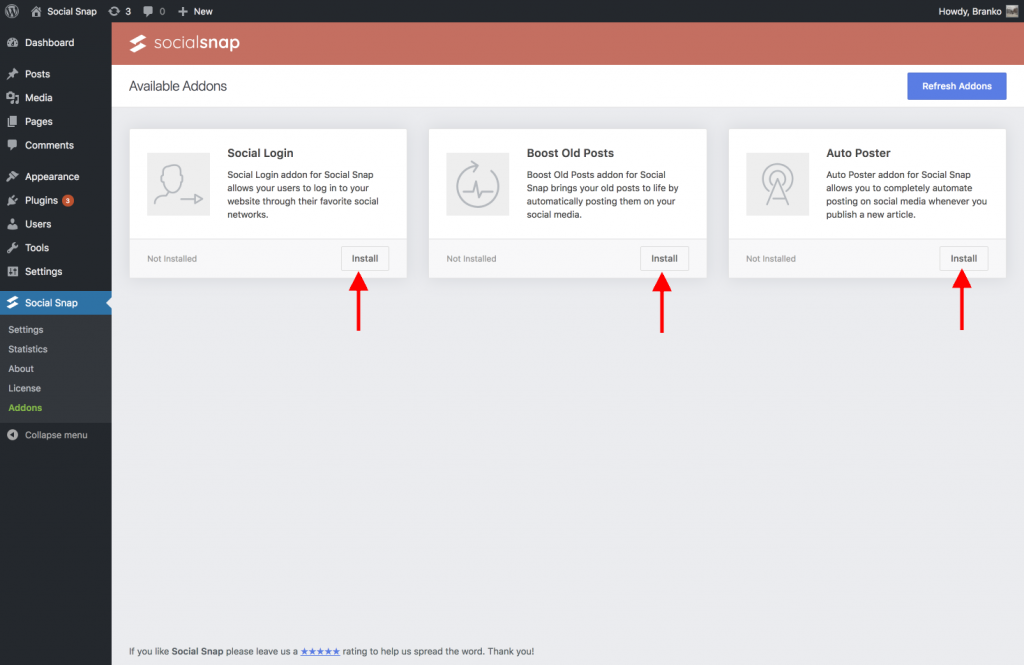
Log into your WordPress Dashboard and go to Social Snap » Addons page.
Once you’re there, you’ll see all addons available with your license level. If you don’t see any addons, click on the Refresh Addons button and that should fix the issue for you.
In order to install an addon, simply click on the Install Addons button to begin installing that addon. After the installation has been completed, click the Activate addon.
That’s all! Configure the installed Addon in Social Snap » Settings.
Manually Installing Social Snap Addons By Uploading Files
You can also install Social Snap addons by downloading plugin files and uploading them to your WordPress » Plugins » Add New » Upload Plugin, just like regular plugins.
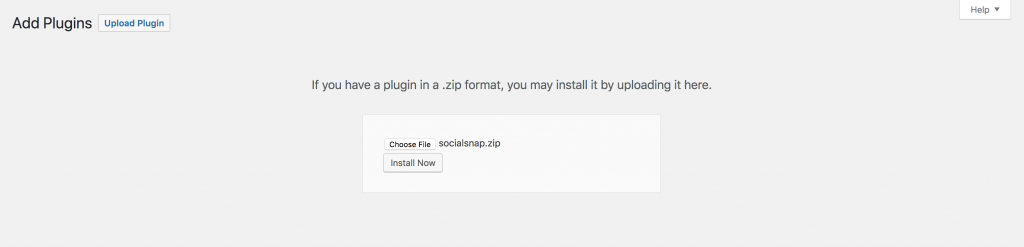
Addon files can be downloaded from your Social Snap » Account.


Was this article helpful?
4 out of 5 found this helpfulWe're always happy to help with any questions you might have!
Open a support ticket and our team will reply with a solution.
Copyright © 2024 Social Snap, LLC. All Rights Reserved.