The document is a step-by-step tutorial on how to create a Google App. Continue reading if you are using a Social Snap addon that requires you to enter Google Client ID and Client Secret.
This tutorial is compatible with Social Login Addon for Social Snap.
Access the Google API Console
First step you need to take is log on to the Google API Console. Log in with your existing Google account or follow the registration process to create an account with Google.
Creating Google Apps
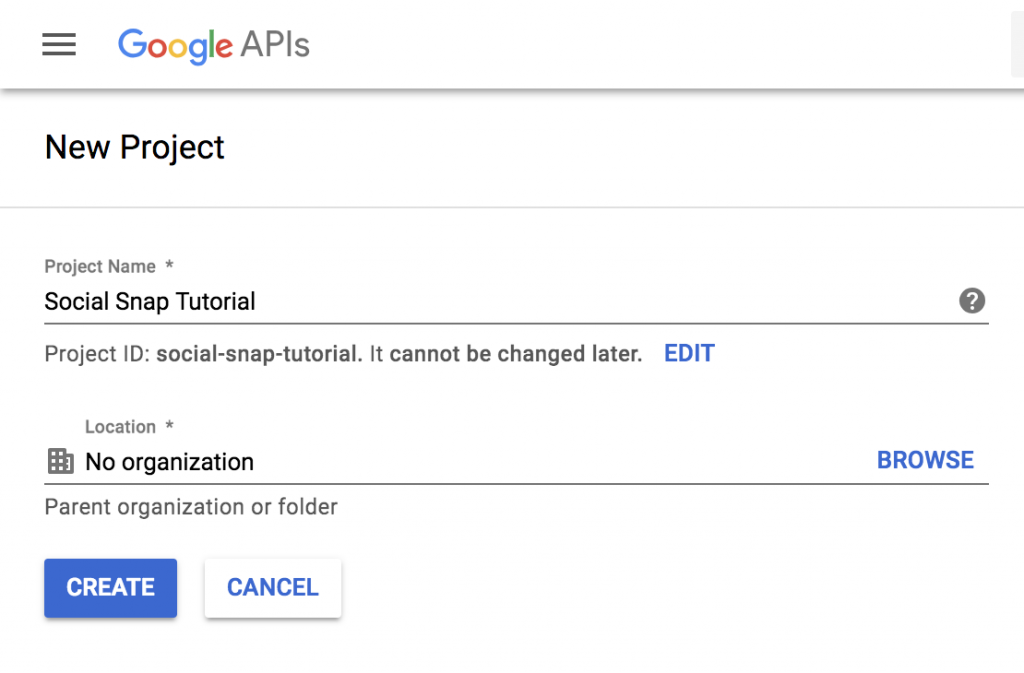
On your Google APIs Dashboard go to Select a Project and then click the plus sign to Create a Project.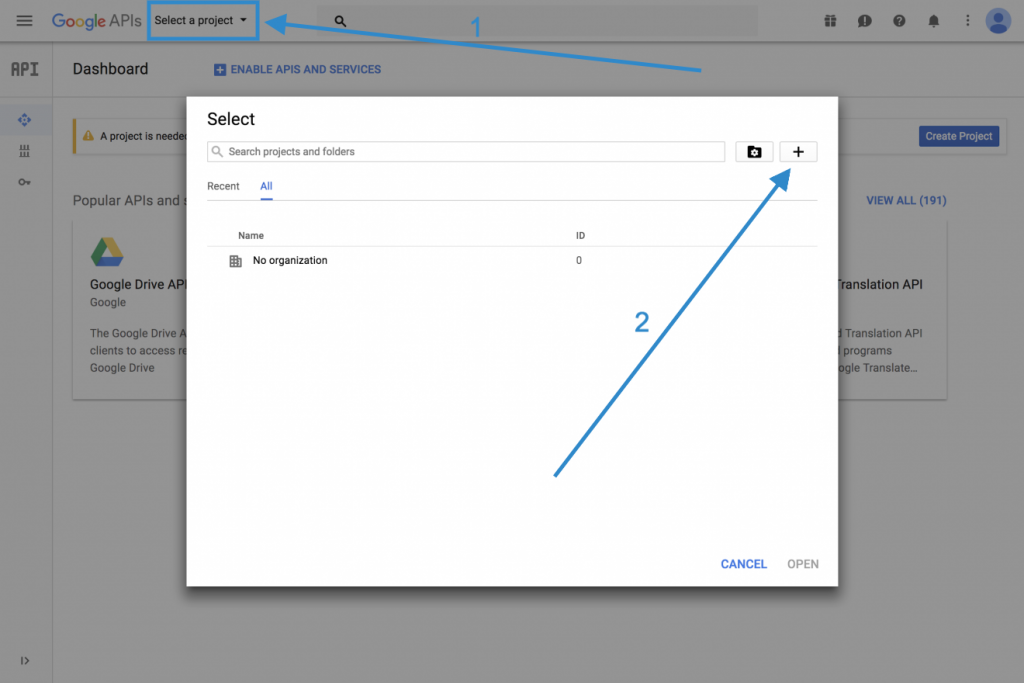
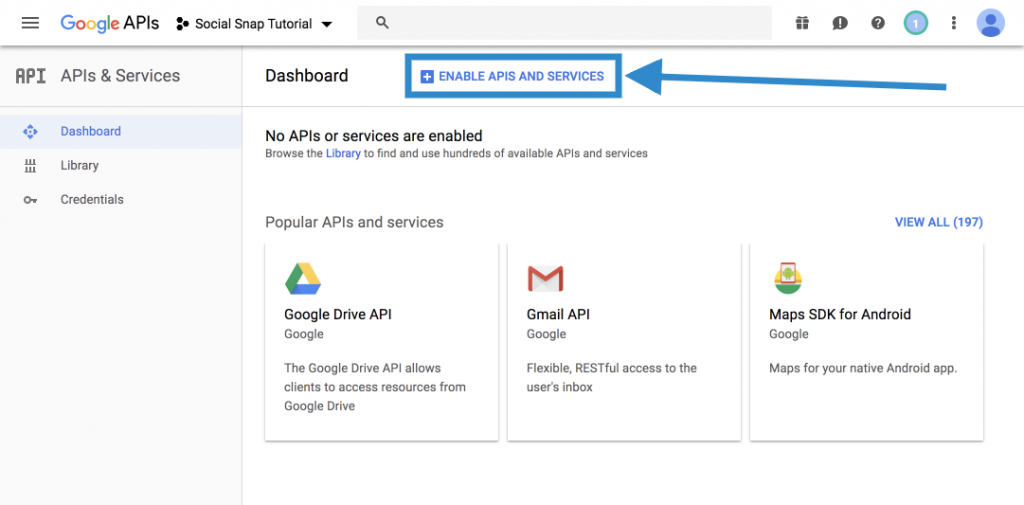
Once you’ve created a project, you should enable the Google People API. In order to do that, click the Enable APIs and Services.
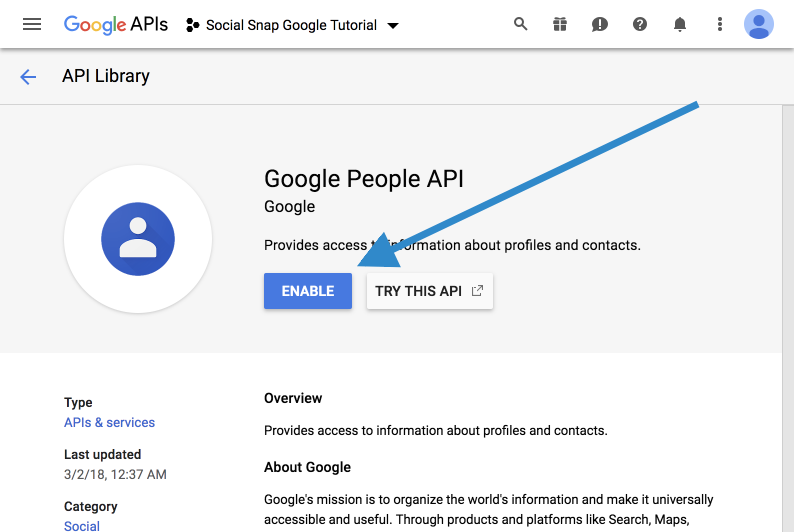
Search for Google People API, and Enable the service.
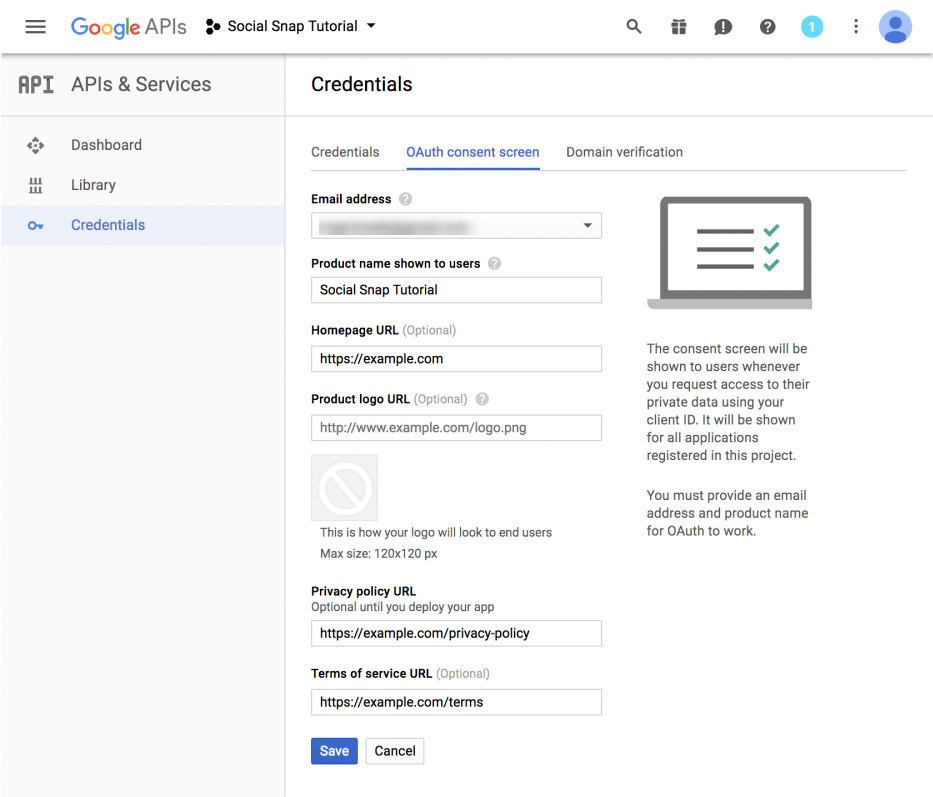
Next step, click on “Credentials” on the left-hand side, then select “OAuth Consent Screen” at the top. You’ll need to enter your site / company information here.
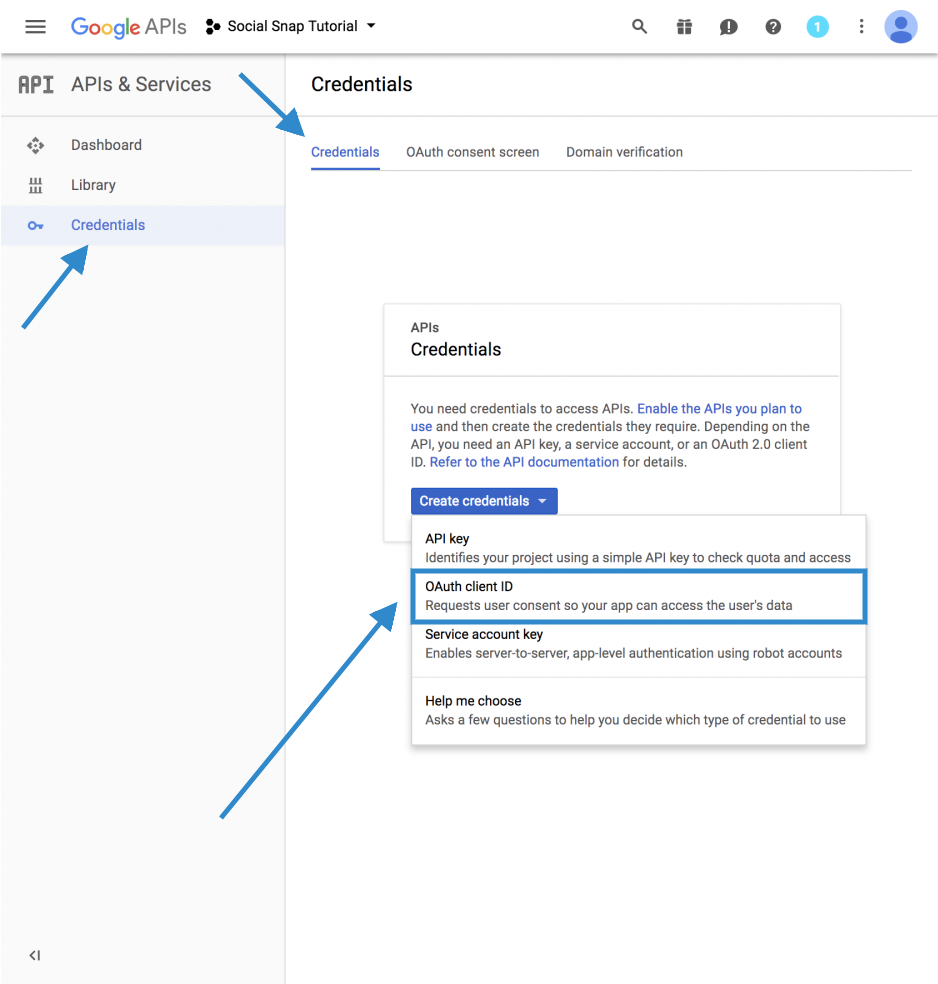
Now go to the Credentials tab and click “Create credentials”. You’ll select “OAuth client ID” for the type.
Select “Web application” for your application type, and complete the application fields.
Under Authorized Javascript Origins, enter your site URL.
In the “Authorized redirect URIs” enter the generated URL from Social Snap Settings. Here’s an example of how the URLs should look like:
Social Login Addon:http://example.com/?socialsnap_social_login_provider=google
Redirect URLs above are examples of how your generated URLs should look like. Please use the generated link displayed in the plugin settings.
You’ll be able to enter multiple OAuth Redirect URLs. Make sure that for each Addon that requires Google credentials, you add the generated URL from Social Snap settings. You can add, remove or modify this later on.
When this is complete, you should get a pop-up with your credentials.
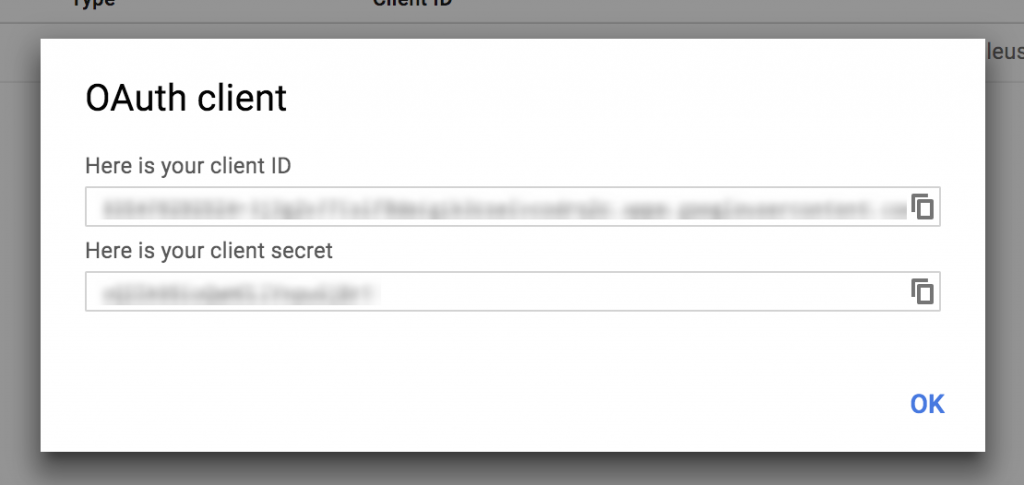
You can access the keys later under“Credentials” tab. Click the Edit or Download to get access to the keys again.

You are now all set to use the Client ID and Client Secret. Copy the credentials to the required fields in the plugin.

Was this article helpful?
2 out of 5 found this helpfulWe're always happy to help with any questions you might have!
Open a support ticket and our team will reply with a solution.
Copyright © 2024 Social Snap, LLC. All Rights Reserved.