The document is a step-by-step tutorial on how to create a Twitter App. Continue reading if you are using a Social Snap feature that requires you to enter Twitter Client ID and Client Secret.
This tutorial is compatible with:
- Social Login Addon for Social Snap
- Boost Old Posts Addon for Social Snap
- Social Auto-Poster Addon for Social Snap
Access the Twitter Developers platform
First step you need to take is log on to the Twitter Apps. Log in with your existing Twitter account or follow the registration process to create an account with Twitter.
Creating Twitter Apps
When you have access to the Twitter developer platform, click Create New App.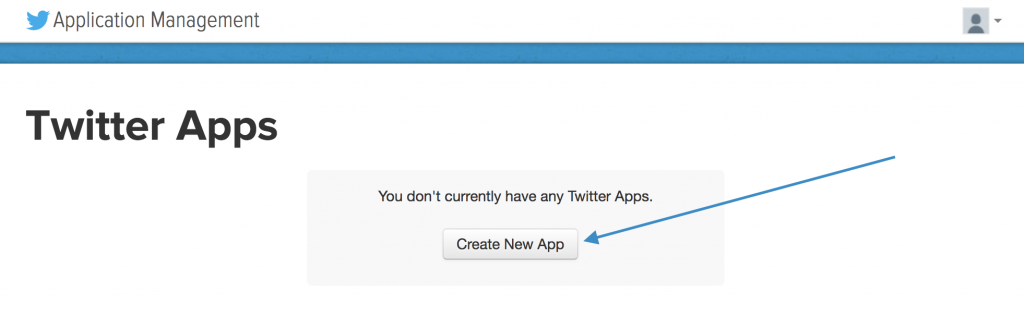
You will be required to fill in a form with information about your App.
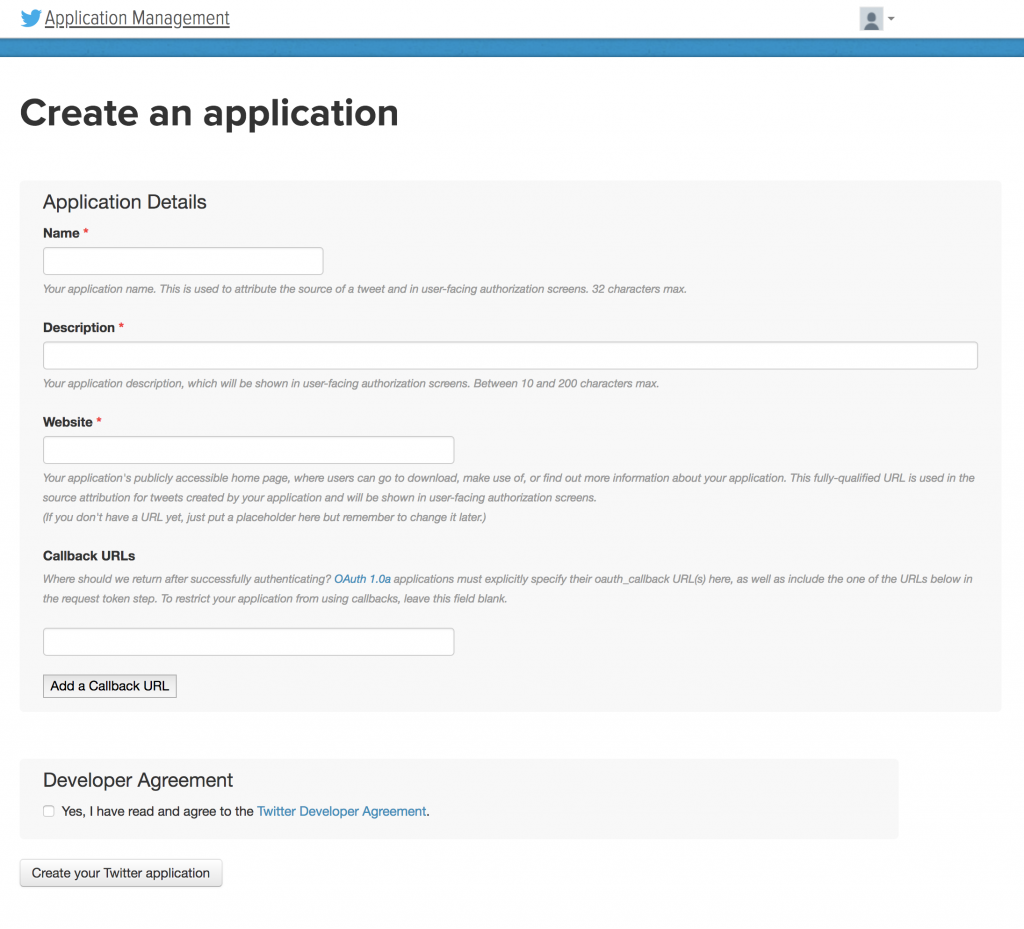
Name: Provide a unique name for your App (one that no one else has used for their Twitter app). For example, you can enter your domain name.
Description: Provide more details about your app, something that will help you distinguish this app from others that you might create in the future. You can change this later on if necessary.
Website: Put your website in the website field.
Callback URL: The URL you should enter is listed under the Twitter Consumer Key and Twitter Consumer Secret field in the Social Snap Settings. This URL will look something like this, but please use the generated link displayed in the plugin settings:
Social Login Addon: https://mysite.com/?socialsnap_social_login_provider=twitter
You’ll be able to enter multiple Callback URLs. Make sure that each generated URL from Social Snap settings is added. Different features (addons) require unique Callback URLs. You can add, remove or modify this later on.
Once you’ve done this, agree to the developer agreement, and click “Create your Twitter Application”. Once you’ve confirmed your settings and created your app, you’ll be able to manage the app.
Configure Twitter App
After creating your app, you will be automatically redirected to the main app page. Go to the Settings tab to adjust other app settings that customers will see and ensure that the option to “Allow this application to be used with sign in with Twitter” is enabled.
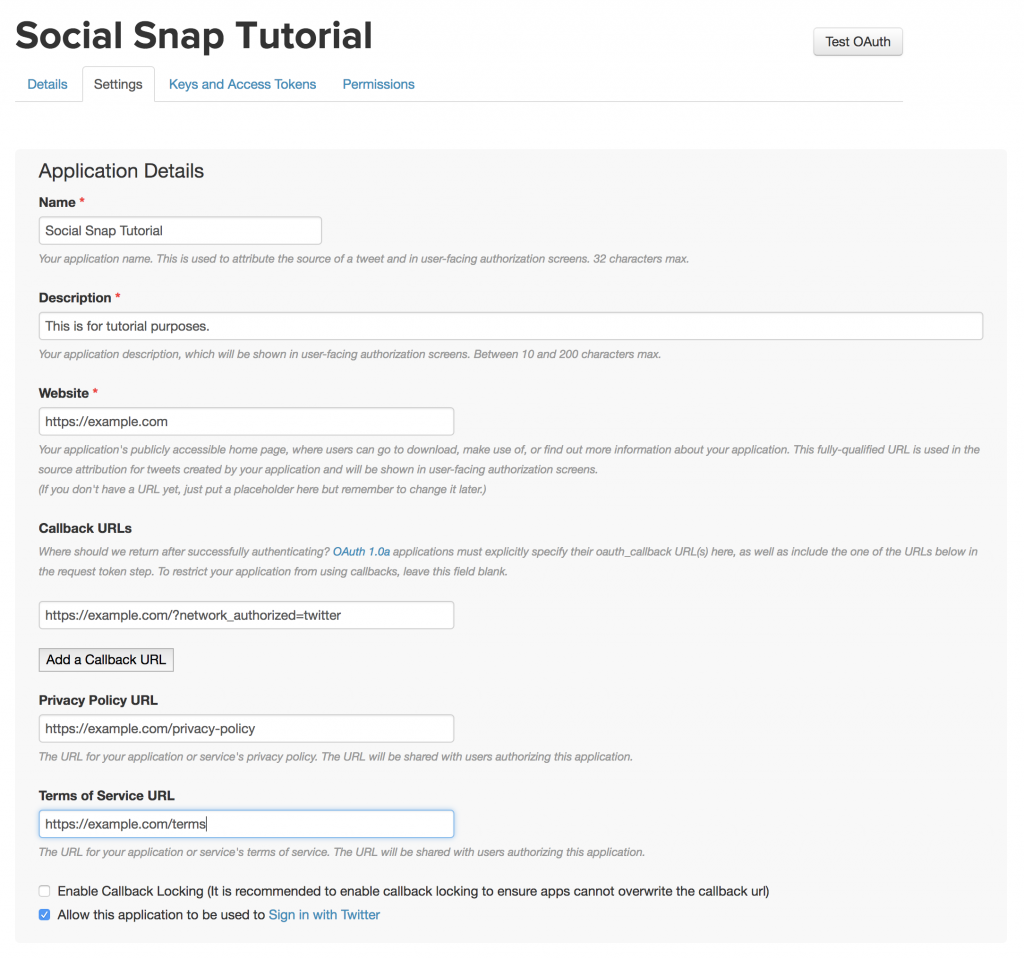
Go to the Permissions tab and set the permission level. By default, your app is a “Read and Write” application. You can see which permissions are required for the following features:
- Social Login Addon – requires at least “Read Only” permission and enabled option “Request email addresses from users”.
- Boost Old Posts Addon – requires at least “Read and Write” permission.
- Social Auto-Poster Addon – requires at least “Read and Write” permission.
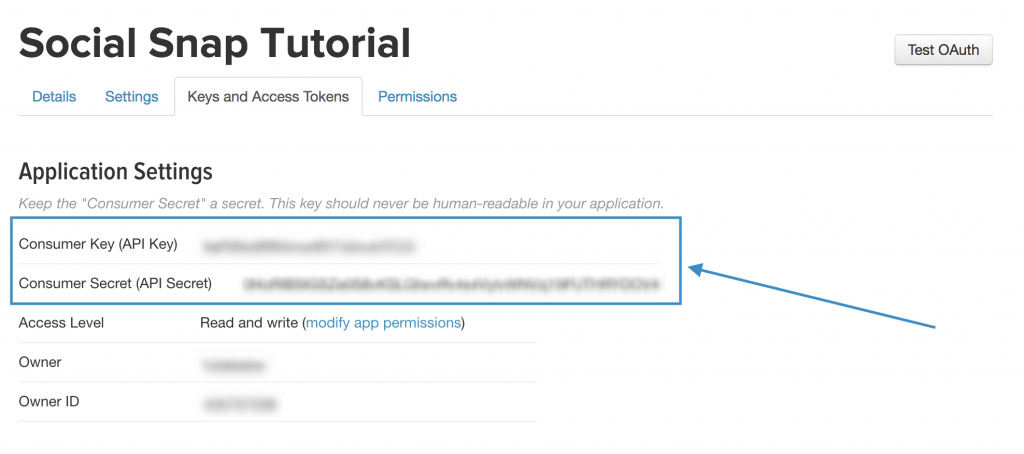
You are now all set up to use your App credentials for Social Snap. Go to the Keys and Access Tokens tab and grab the API Key and API Secret. Copy the credentials to the required fields in the plugin.
You can use one Twitter App (same credentials) for all Addons. All you need to do is make sure that permissions meet with each addon’s requirements.

Was this article helpful?
1 out of 7 found this helpfulWe're always happy to help with any questions you might have!
Open a support ticket and our team will reply with a solution.
Copyright © 2024 Social Snap, LLC. All Rights Reserved.