# How to Install Social Snap Lite (Free)
Have you purchased Social Snap? If so, then these instructions are not the ones you are looking for. Please read these instructions instead.
This tutorial is only for Social Snap Lite (free).
Before you start, make sure you are using self-hosted version of WordPress (WordPress.org) and not WordPress.com.
In this article we have covered two installation methods for Social Snap Lite (free): installing using search and manually installing by uploading plugin files.
Installing Social Snap Lite Using Search
This is the easiest way to install Social Snap Lite as WordPress handles the file transfers itself. To do an automatic install of Social Snap follow the steps below:
The first thing you need to do is to log into your WordPress Dashboard. After that go to Plugins > Add New and in the search field, that is located in the top right corner type “Social Snap”.
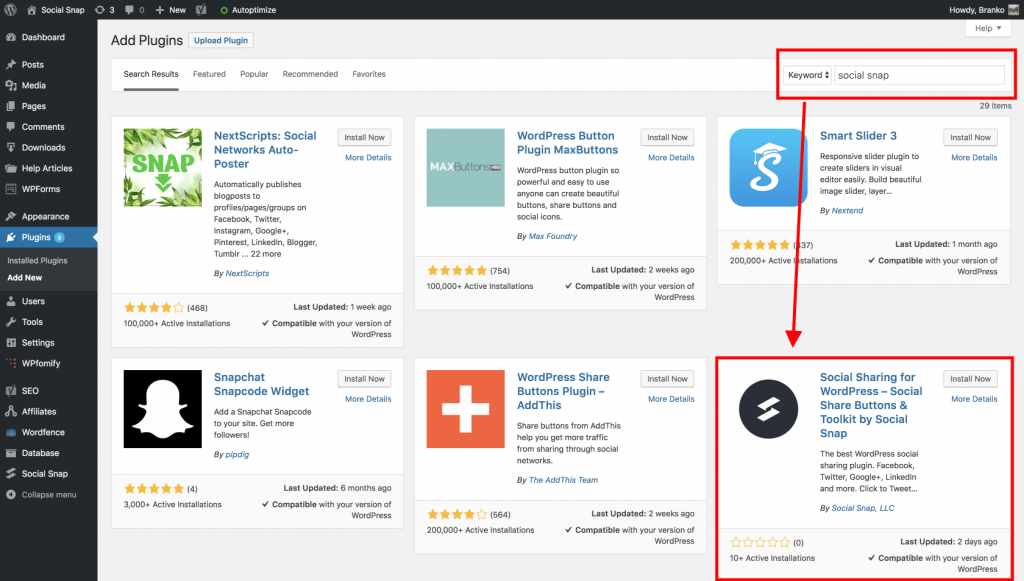
The search result will list several plugins, you need to find “Social Sharing for WordPress – Social Share Buttons & Toolkit by Social Snap” by Social Snap, LLC and click the Install Now button.
WordPress will now download and install the plugin for you. After this, you will see the success message with a link to activate the plugin – click it.
That’s all, you have successfully installed Social Snap Lite plugin on your website.
In order to start customizing Social Snap, navigate to the Social Snap tab at the bottom of your admin menu and click the “Settings” button.
Manually Installing Social Snap Lite
Download Social Snap Lite from WordPress plugin repository. The downloaded file is named socialsnap.zip. Download Social Snap Lite
Now, log into your WordPress Dashboard and go to Plugins > Add New. Click Upload Plugin, located in the top left corner and upload the socialsnap.zip.
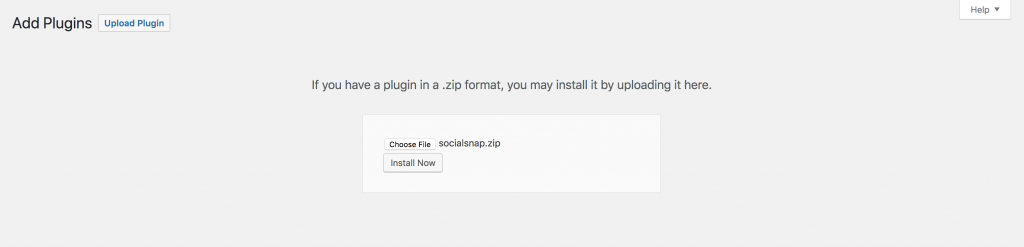
After you have selected the file, you need to click on the install now button.
WordPress will now upload the plugin file from your computer and install it for you. You will see a success message after the installation is finished. Once installed, you need to click on the Activate Plugin link to start using the plugin.
That’s all, you have successfully installed Social Snap Lite plugin on your website.
In order to start customizing Social Snap, navigate to the Social Snap tab at the bottom of your admin menu and click the “Settings” button.

Was this article helpful?
6 out of 10 found this helpfulWe're always happy to help with any questions you might have!
Open a support ticket and our team will reply with a solution.
Copyright © 2025 Social Snap, LLC. All Rights Reserved.