Important: Facebook has made a change to their API so that third-party apps don’t have permission to automatically share posts to Facebook Pages and Profiles. This affects the Social Auto-Poster and Boost Old Posts addon, where Facebook will no longer be available. If you have any questions regarding the new API, please head to Facebook Help Community.
The document is a step-by-step tutorial on how to create a Facebook App. Continue reading if you are using a Social Snap addon that requires you to enter Facebook App ID and App Secret.
This tutorial is compatible with:
Access the Facebook Developers platform
First step you need to take is log on to the Facebook Developer platform. Log in with your existing Facebook account or follow the registration process to create an account with Facebook.
Creating Facebook Apps
Go to My Apps and then click Add New App.
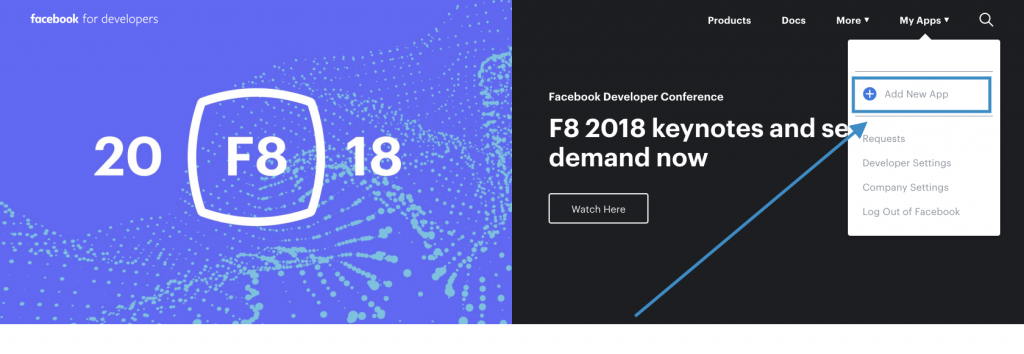
If this is the first time you’re accessing the Facebook Developer portal, you will see a Get Started link instead. Follow the step to register and verify your account first.
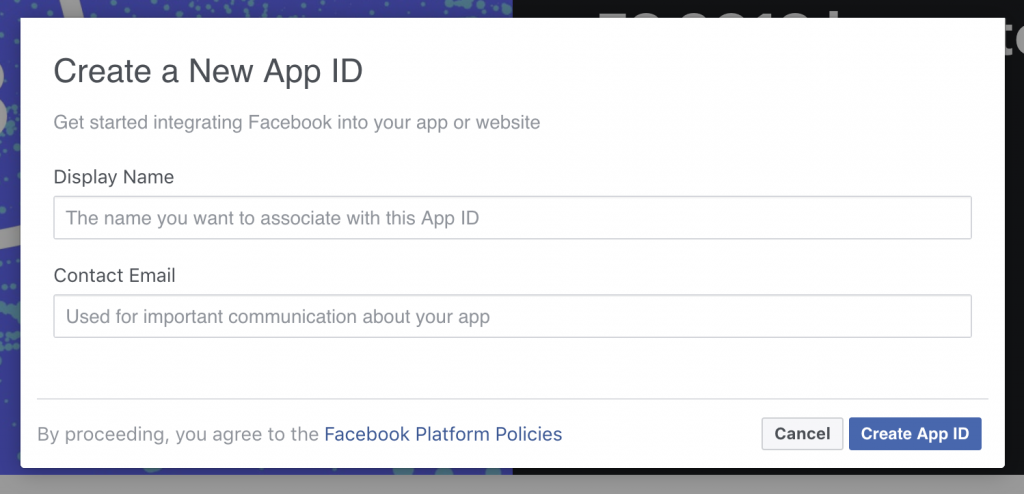
Configure Facebook App
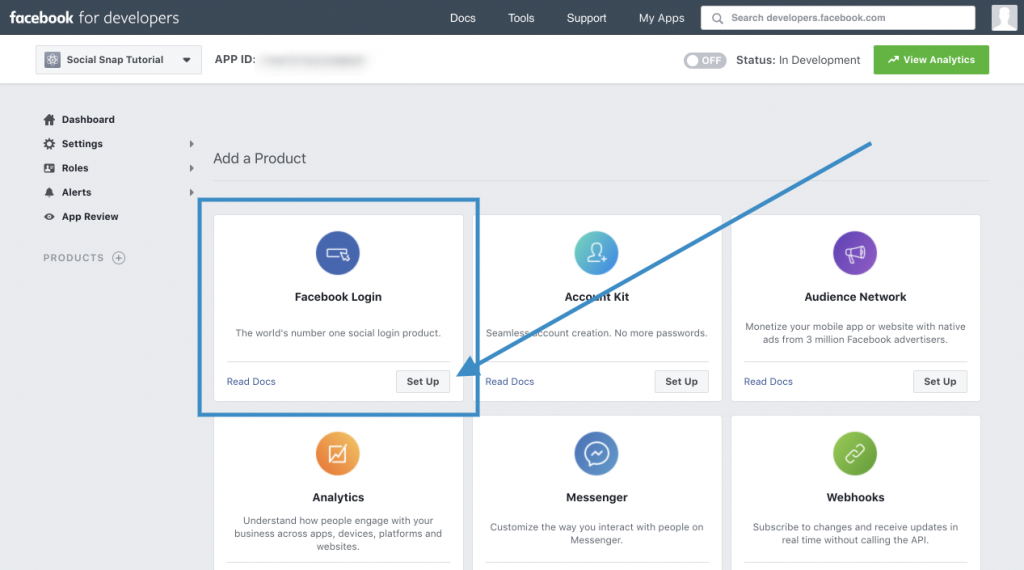
Click “Set Up” for the Facebook Login module.
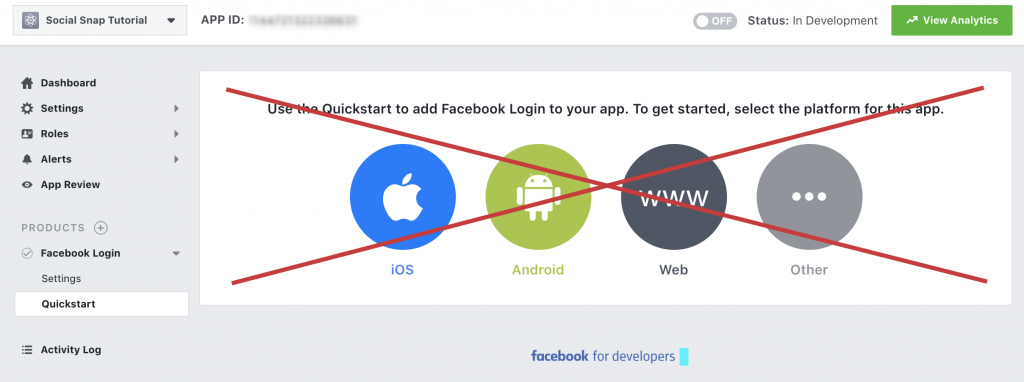
Important: Skip the Quickstart wizard. Instead go to Settings » Basic.
Click Add Platform and choose Website for your platform. Fill in other info on thepage as required and save the changes.
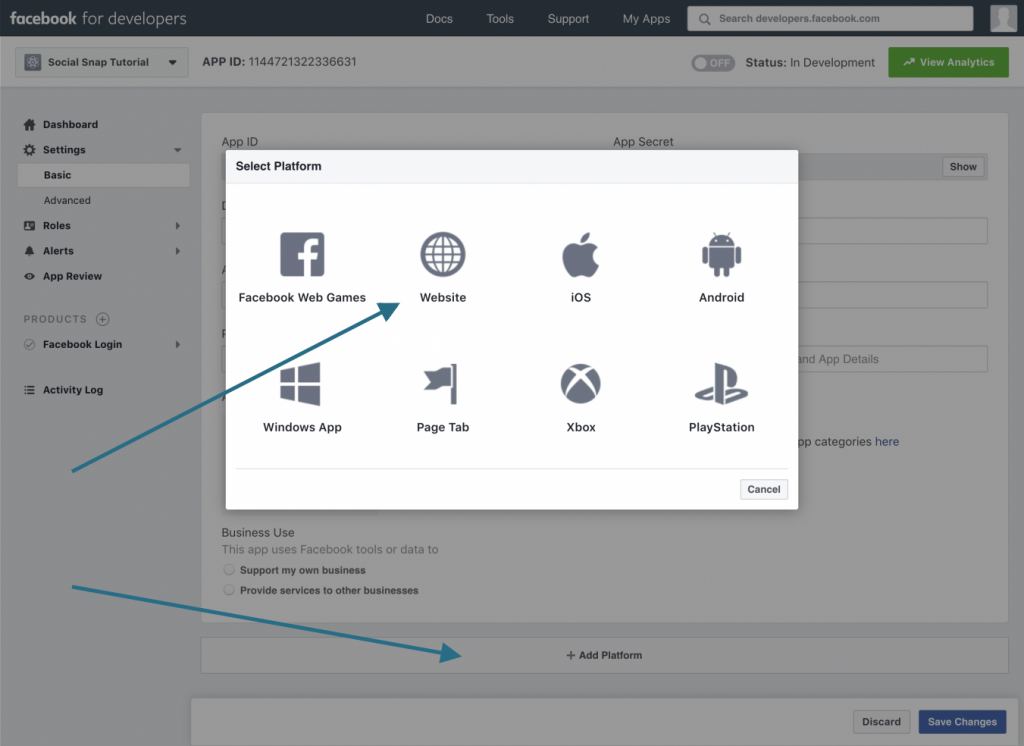
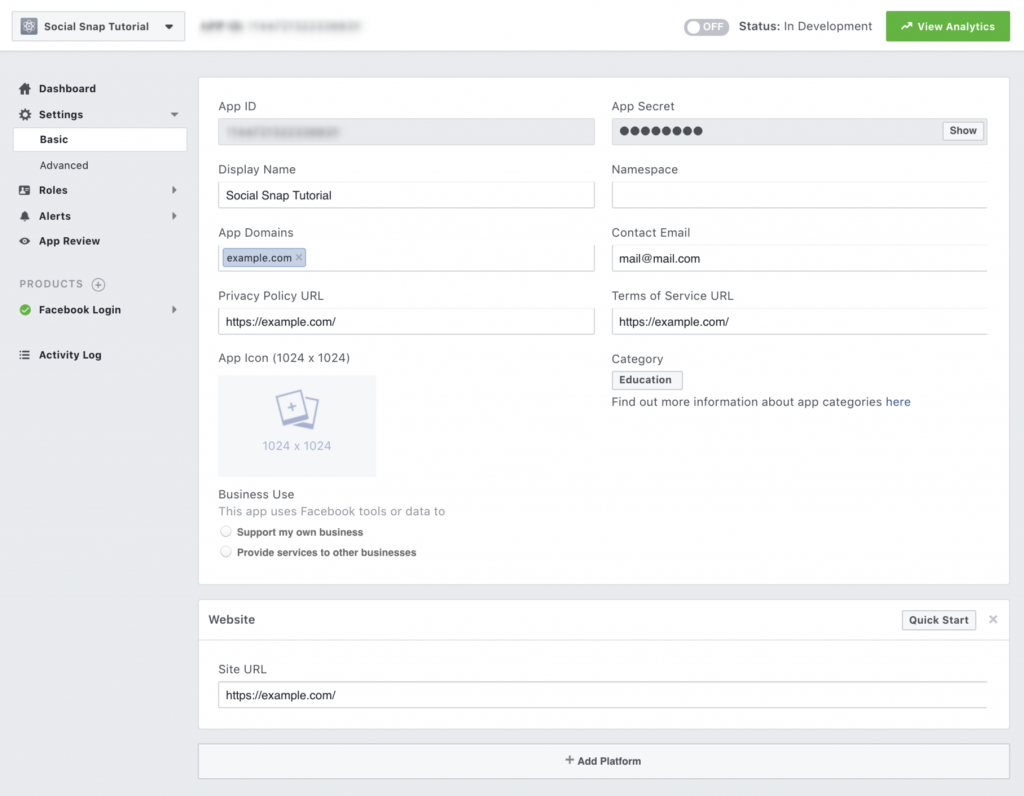
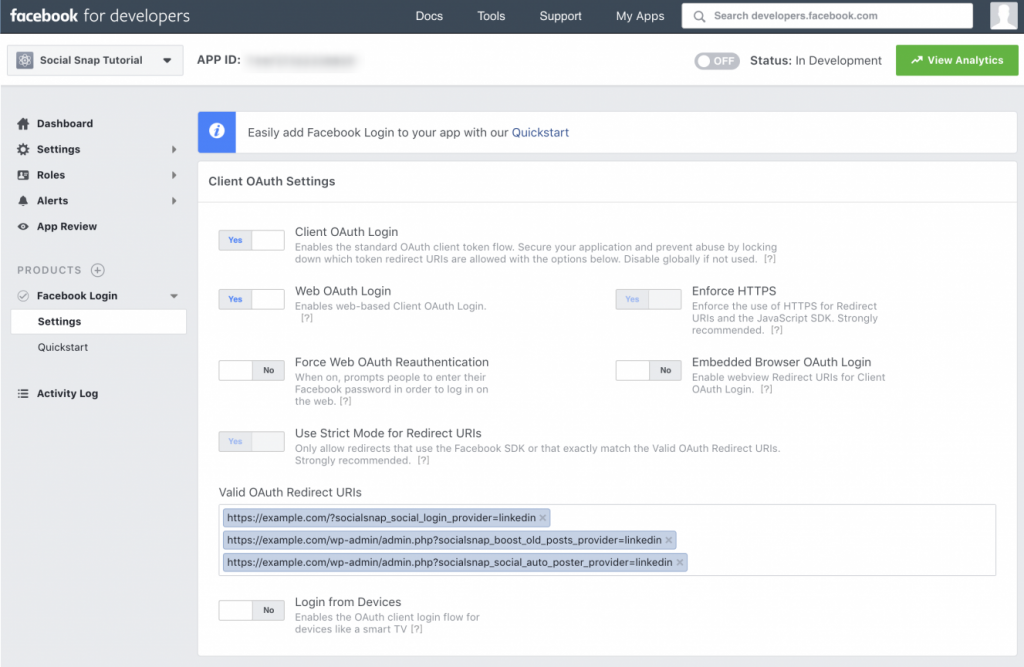
Once you have everything filled in, go to Facebook Login » Settings to configure “Valid OAuth Redirect URIs”.
You’ll be able to enter multiple OAuth Redirect URLs. Make sure that for each Addon, you add the generated URL from Social Snap settings. Different features (addons) require unique OAuth Redirect URLs. You can add, remove or modify this later on.
Here’s an example of how the URLs should look like:
- Social Login Addon:
http://example.com/?socialsnap_social_login_provider=facebook - Boost Old Posts Addon:
http://example.com/wp-admin/admin.php?socialsnap_boost_old_posts_provider=facebook - Social Auto-Poster Addon:
http://example.com/wp-admin/admin.php?socialsnap_social_auto_poster_provider=facebook
Redirect URLs above are examples of how your generated URLs should look like. Please use the generated link displayed in the plugin settings.
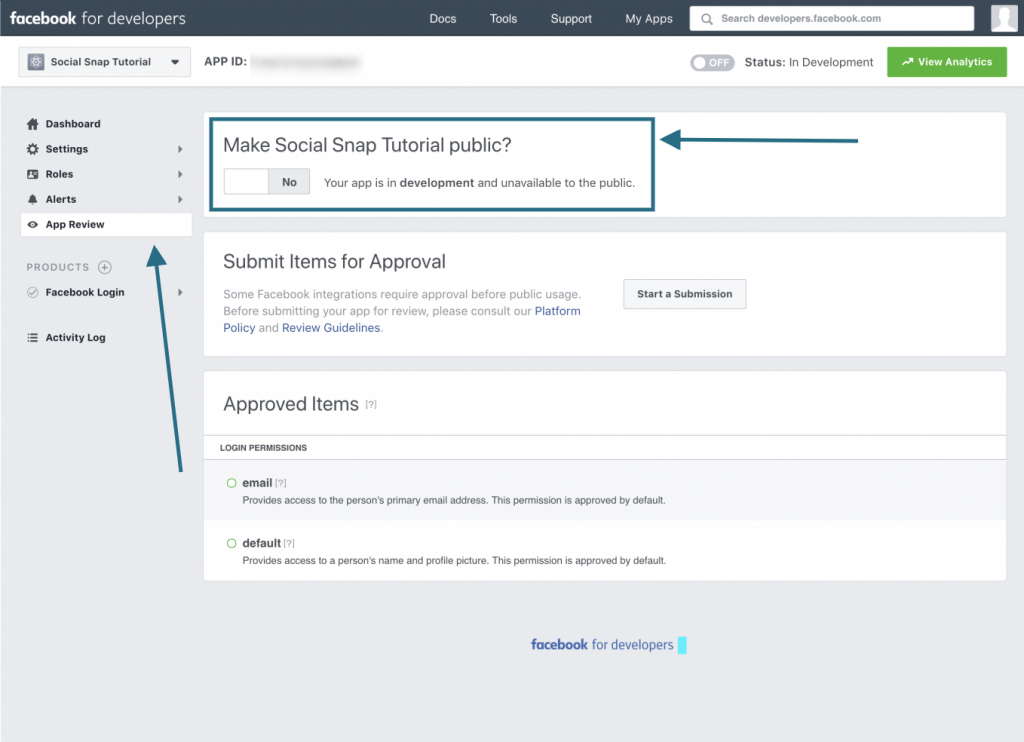
You are now all set to make your Facebook App live and start using the App credentials. To make the app live, go to App Review change the status to “Live”.
You are now all set to use the App ID and App Secret from the app’s “Settings » Basic” tab. Copy the credentials to the required fields in the plugin.

Was this article helpful?
1 out of 8 found this helpfulWe're always happy to help with any questions you might have!
Open a support ticket and our team will reply with a solution.
Copyright © 2026 Social Snap, LLC. All Rights Reserved.
